Container Databases (CDB) and Pluggable Databases (PDB) for oracle 12 C
The multitenant option represents one of the biggest architectural changes in the history of the Oracle database. This option introducs the concepts of the Container Database (CDB) and Pluggable Database (PDB).
• Container Database (CDB) : On the surface this seems very similar to a conventional Oracle database, as it contains most of the working parts you will be already familiar with (controlfiles, datafiles, undo, tempfiles, redo logs etc.) It also houses the data dictionary for those objects that are owned by the root container and those that are visible to all PDBs.
• Pluggable Database (PDB) : Since the CDB contains most of the working parts for the database, the PDB only needs to contain information specific to itself. It does not need to worry about controlfiles, redo logs and undo etc. Instead it is just made up of datafiles and tempfiles to handle it's own objects. This includes it's own data dictionary, containing information about only those objects that are specific to the PDB
So can we use a PDB for VC? The answer is yes and the steps below show how to configure this.
Create and Configure a Container Database (CDB) in Oracle Database 12c
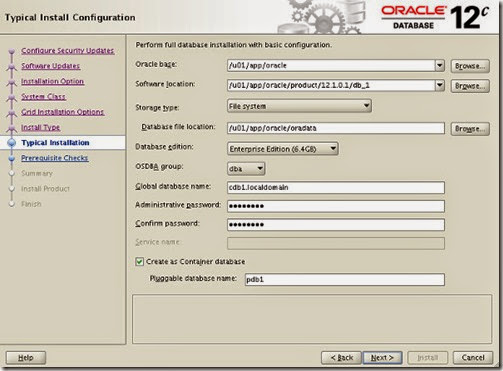
The Oracle Universal Installer (OUI) allows you to create a container database (CDB) during the software installation. The "Typical Install Configuration" screen has a checkbox to indicate the database is a container database. You can optionally create a single pluggable database (PDB) in this screen also.
The advanced configuration options provides the same ability on the "Database Identifiers" screen.
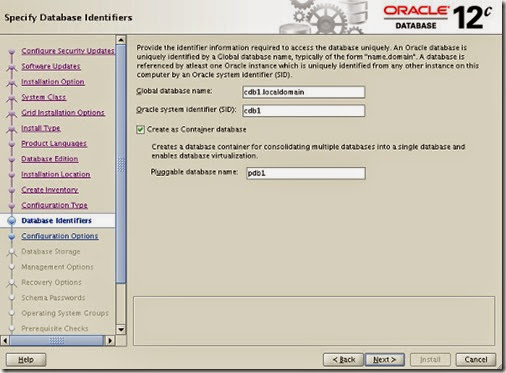
In both cases the creation of a pluggable database (PDB) is optional, so you can create an empty container database and create the pluggable database later if you wish
The Database Configuration Assistant (DBCA) gives similar options to the Oracle Universal Installer (OUI). The "Creation Mode" page allows you to enter the default installation configuration details directly
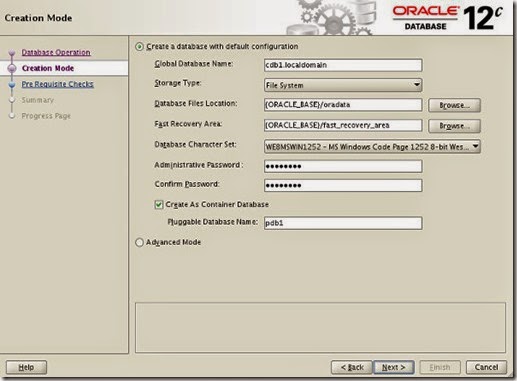
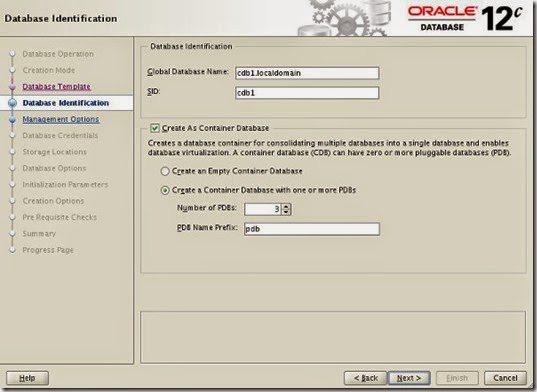
If you chose the "Advanced Mode" option, you can create a CDB and multiple PBDs in one go.
Create and Configure a Pluggable Database (PDB) in Oracle Database 12c
The DBCA includes a new option on the opening "Database Operation" screen that allows you to manage the pluggable databases of an existing container database. Select the "Manage Pluggable Databases" option and click the "Next" button.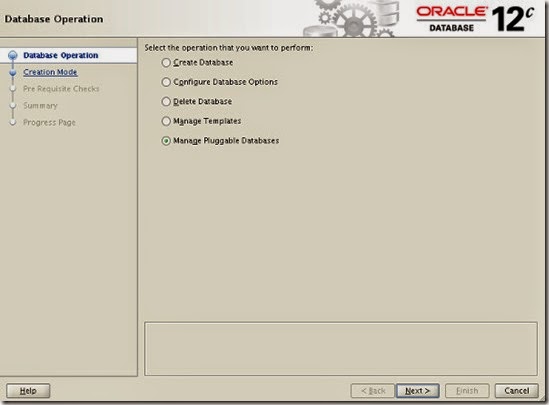
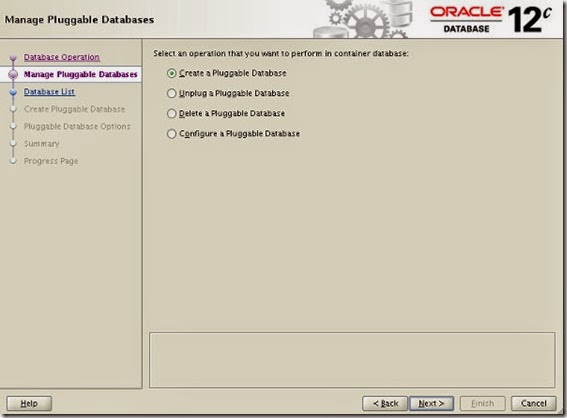
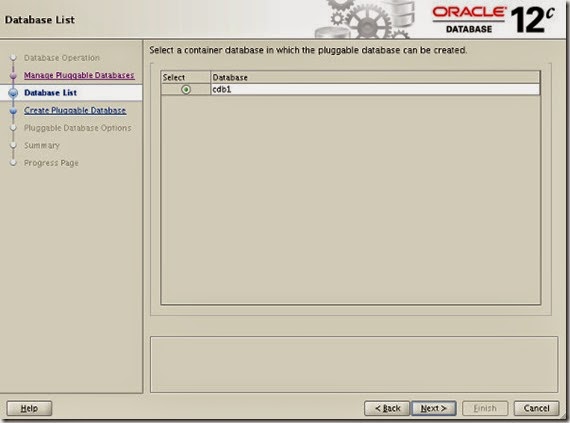
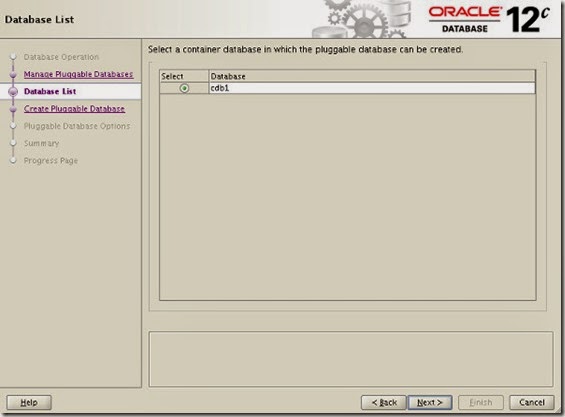
On the "Manage Pluggable Databases" screen shown previously, select the "Create a Pluggable Database" option and click the "Next" button. On the resulting screen, select the container database to house the new pluggable database and click the "Next" button.
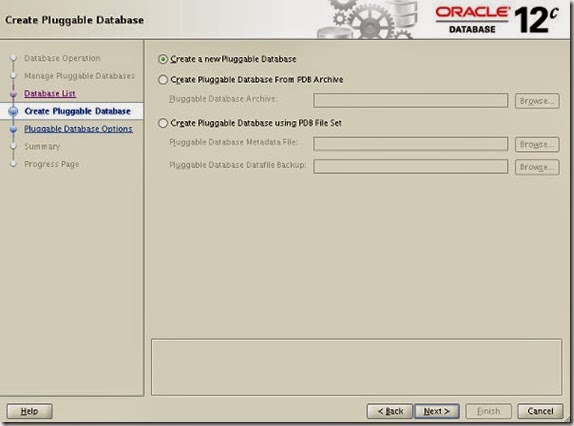
Select the "Create a new Pluggable Database" option and click the "Next" button. If you were plugging in a previously unplugged database, you would select the PDB Archive or PDB File Set options to match the format of the files containing the unplugged PDB.
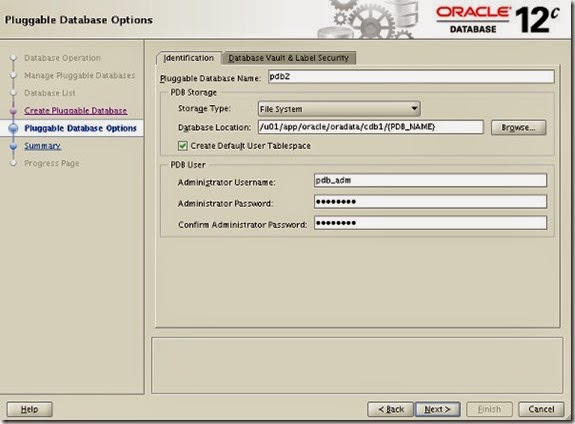
Enter the pluggable database name, database location and admin credentials, then click the "Next" button
If you are happy with the summary information, click the "Finish" button
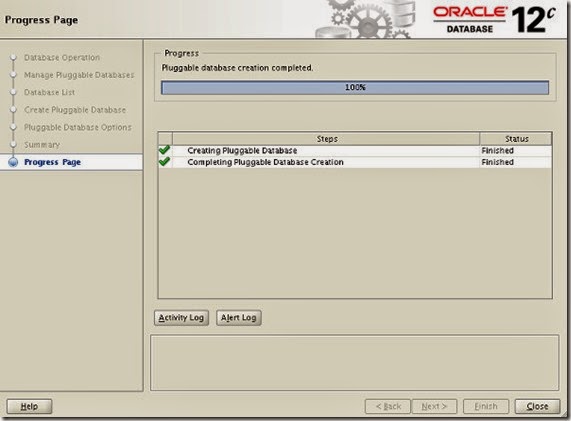
Wait while the pluggable database is created. Once complete, click the "OK" button on the message dialog and the "Close" button on the main screen.
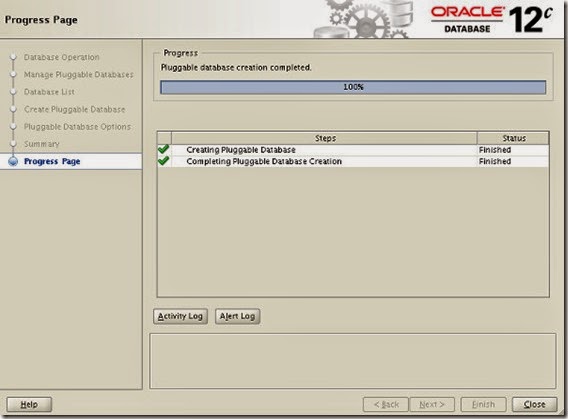
The new pluggable database has been created as a clone of the seed database.
If you want to use a PDB using the DBCA, on the "Manage Pluggable Databases" screen shown previously, select the "Create a Pluggable Database" option and click the "Next" button. On the resulting screen, select the container database to house the new pluggable database and click the "Next" button
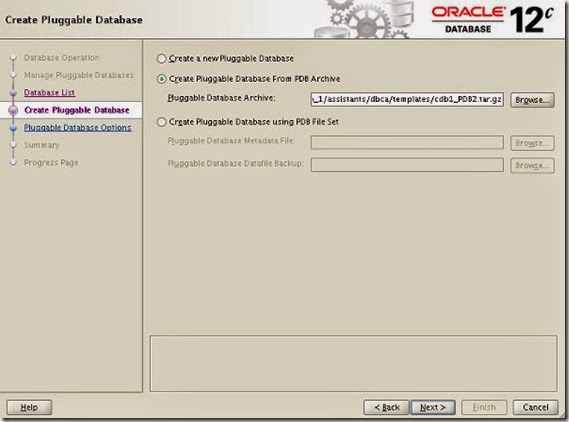
Select the "Create Pluggable Database From PDB Archive" or "Create Pluggable Database using PDB File Set" option and enter the location of the required files. You can browse for the files using the "Browse" button.
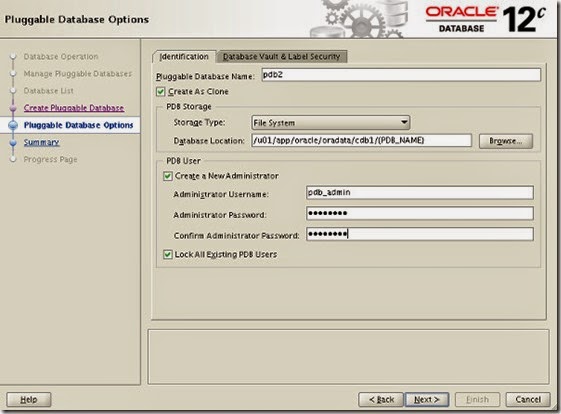
Enter the pluggable database name, database location and admin credentials, then click the "Next" button
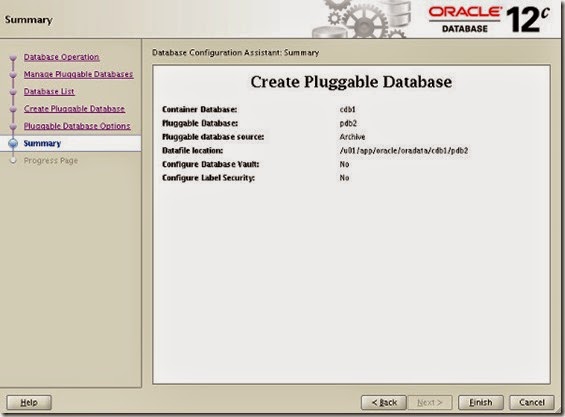
If you are happy with the summary information, click the "Finish" button.
Wait while the pluggable database is created. Once complete, click the "OK" button on the message dialog and the "Close" button on the main screen.
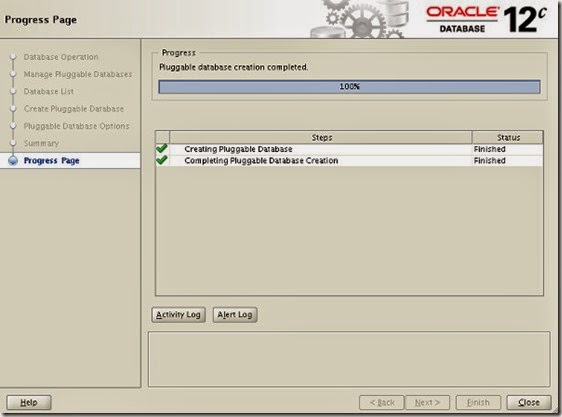
The pluggable database has been plugged into the container database.
Steps to configure VC/VCVA using oracle 12c pluggable database.
Once you are done with container DB and pluggable DB, create schema and user for virtual center server. The steps are below.You can create schema using sql developer/Enterprise Manger/cmd line.
Enterprise Manger URL: https://<oracleserver IP>:5500/em (You can use enterprise manager tool which is inbuit with database, you can perform the dba tasks using this tool)
I will use SQL developer to demonstrate the steps:
Go to Start-->Program Files-->click on SQL developer (It may ask for JRE path, please provide the same).
Click on File-->New Connection select Database connection and click on ok
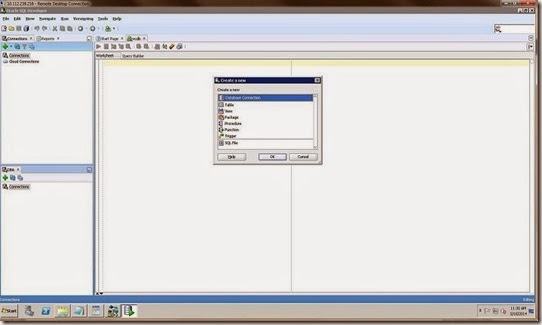
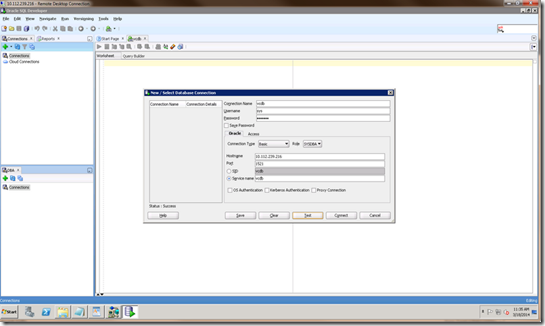
Provide the connection details
Connection Name:<vcdb>(up to you)
Username:sys
Password:” provide sys password”
Select Role:sysdba
Connection type :Basic
Hostname: <oracle server IP>
Port:Default port no <1521>
Service name: <database name>(In my case database name is as “vcdb”)
Open the worksheet and execute the below commands.
ALTER SESSION SET CONTAINER = PDB;(here PDB is pluggable DB)CREATE SMALLFILE TABLESPACE vcdb DATAFILE
'C:\app\oracle\oradata\vcdb\PDB\vcdb'SIZE 1G AUTOEXTEND ON NEXT 10M MAXSIZE UNLIMITED LOGGING EXTENT MANAGEMENT LOCAL SEGMENT SPACE MANAGEMENT AUTO;
CREATE USER vcdb2 PROFILE DEFAULT IDENTIFIED BY ca$hc0w DEFAULT TABLESPACE vcdb ACCOUNT UNLOCK CONTAINER = CURRENT;
grant connect to vcdb;
grant resource to vcdb;
grant create view to vcdb;
grant create sequence to vcdb;
grant create table to vcdb;
grant create materialized view to vcdb;
grant unlimited tablespace to vcdb;
grant execute on dbms_lock to vcdb;
grant execute on dbms_job to vcdb;
grant select on dba_tablespaces to vcdb;
grant select on dba_temp_files to vcdb;
grant select on dba_data_files to vcdb
For Windows virtual center server:
Go to that machine where you want to install virtual center server and Install oracle 12 client on the machineCreate a System DSN Entry
1. Navigate to Data Sources (ODBC) (Run->obdbad32)
2. In the ODBC Data Source Administrator dialog, click on the "System DSN" tab
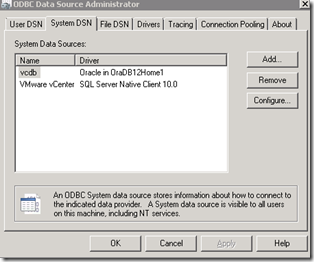
3. Click on the "Add..." button to add a new System DSN entry
4.In the "Create New Data Source" dialog, select "Oracle in OraDB12Home1" and click "Finish"
5. In the "oracle driver Driver" dialog, enter a "Data source name"
Datasource Name:<vcdb>(whatever you want)
Description:<” Info”>
TNS Service Name:<oracleserver IP:/plugguble DB> (In my case “10.112.239.216:/pdb” here pdb is pluggable DB this is changed in oracle 12c)
User ID:<vcdb>whatever you have created (in my case “vcdb”)
Password:<Password for user>
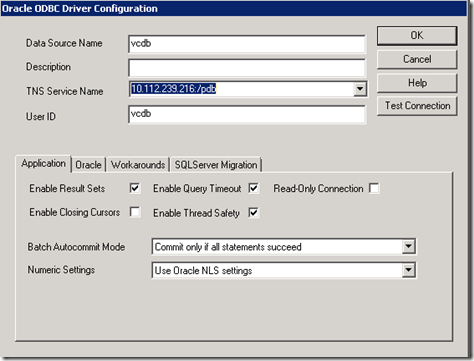
6. From the Data Source tab, enter the "User ID", and click "Test Connection".
7. Provide password and and test the connection. If everything is setup correctly, you should see "Connection successfully"
Once it is configured, you can proceed with VC installation using oracle 12c database.
For VCVA:
1. Deploy VCVA2.Open the virtual appliance management interface (VAMI)
3.Accept the EULA and cancel vcva configuration
4. Re login VAMI go to database provide the database details
Database type: oracle
Server:<oracle server IP>(in my case 10.112.239.216)
Port:<default Port>(1521)
Login:<vcdb>
Password:<ca$..>
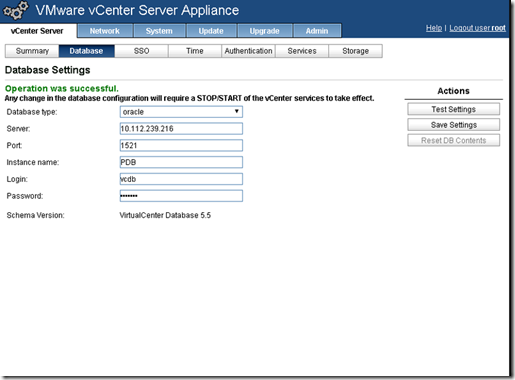
If everything is setup correctly, test the setting and save the setting.Go to Services tab and start the virtual center service
Now your VC is configured to use Oracle 12c!.

